

Custom Domains
Configure custom domains and automatic HTTPS for your QuickStack applications.
Exposing an app on a custom domain requires three steps in order: configure DNS, add the domain in QuickStack, then Deploy.
QuickStack.me Domain No custom domain? Use the built-in QuickStack.me Domain for instant HTTPS — no DNS setup needed.
DNS checklist
Before adding a domain in QuickStack, create an A record at your DNS provider:
| Record type | Hostname | Value |
|---|---|---|
| A | app.example.com | Your server's public IP |
DNS propagation can take a few minutes to several hours. Verify resolution before proceeding.
QuickStack UI steps
- Open the app and click the Domains & Networking tab.
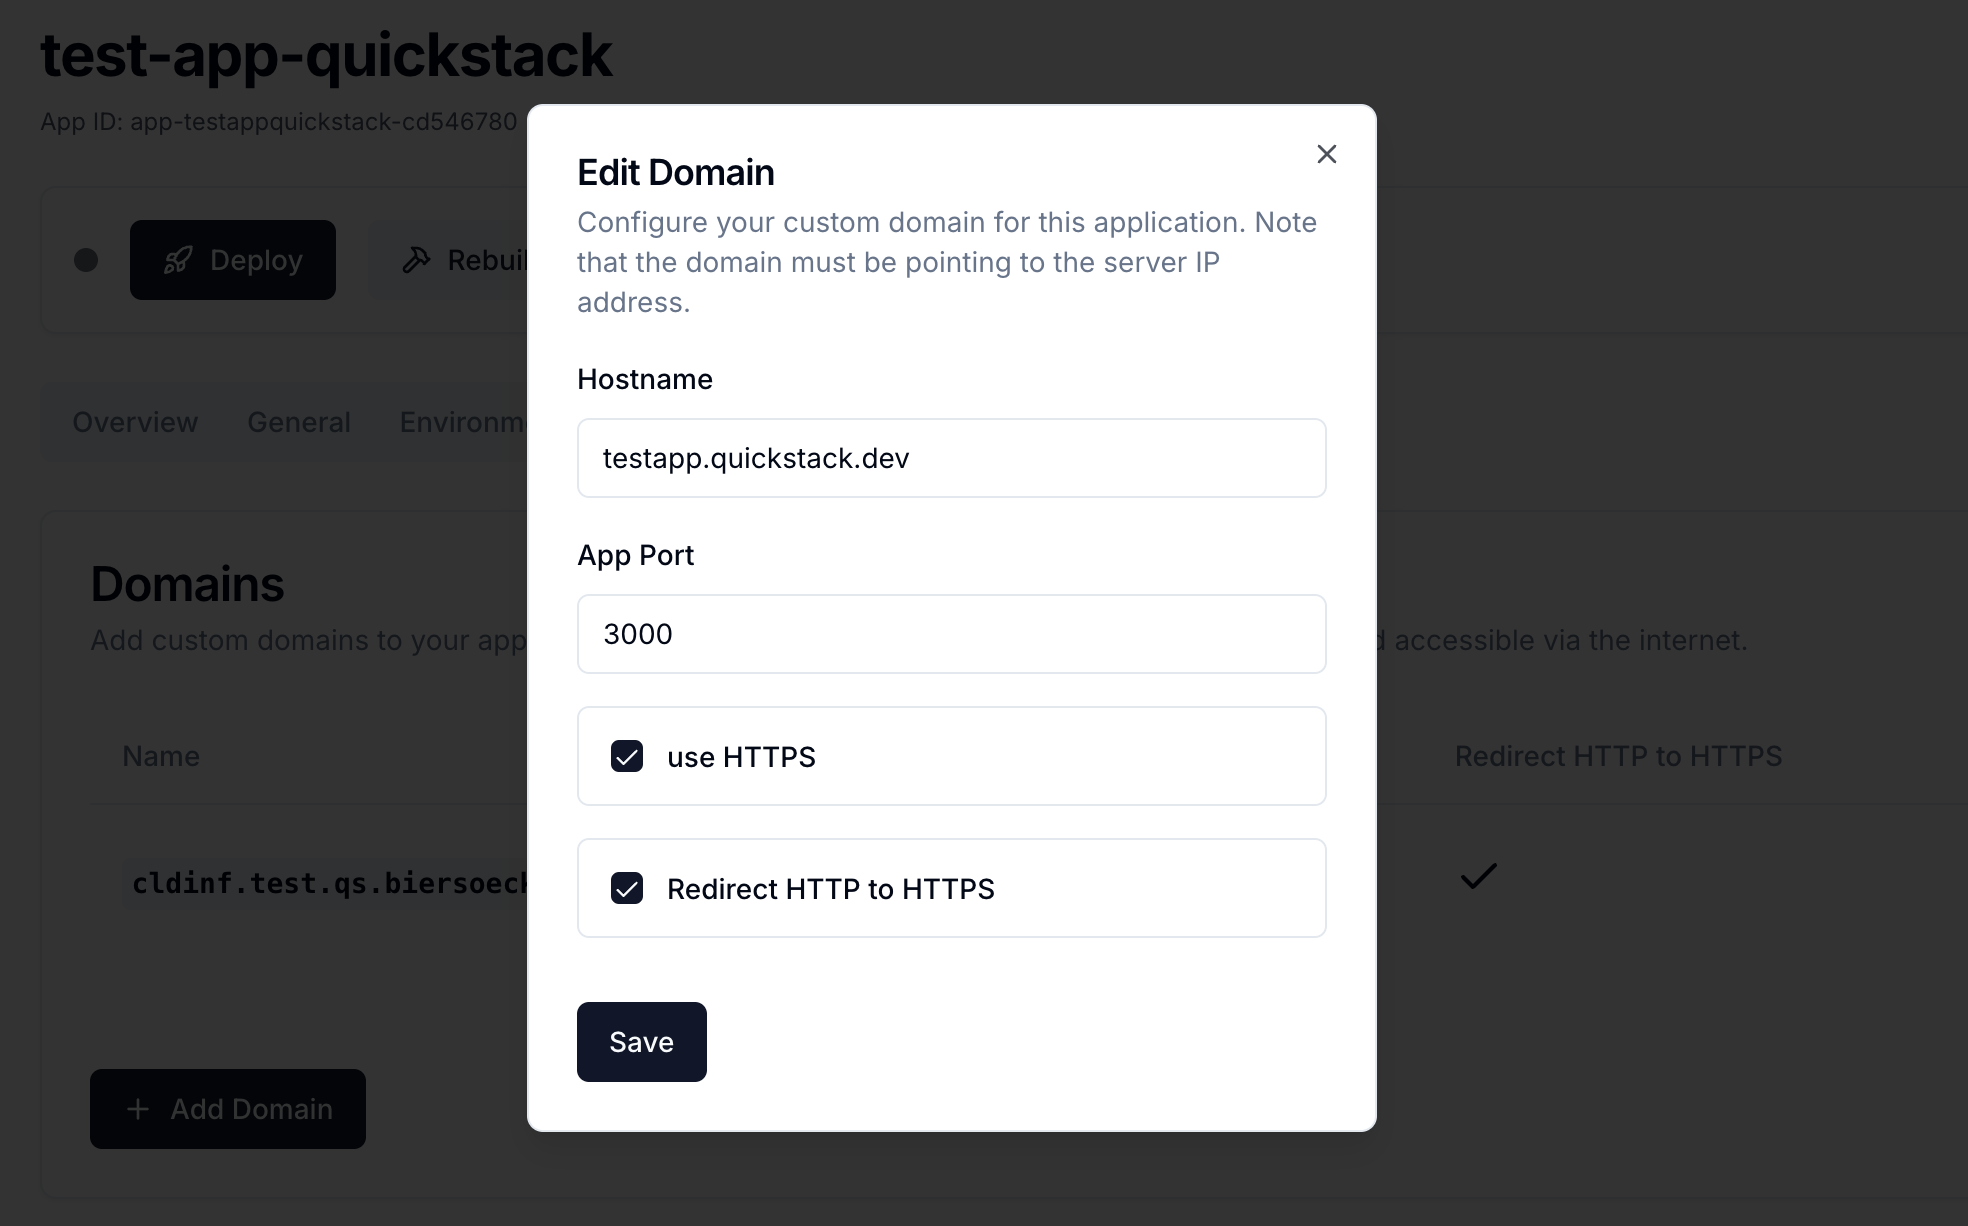
- Click Add Domain to open the Edit Domain dialog.
- Fill in the fields:
- Hostname — the domain or subdomain (e.g.
app.example.com) - App Port — the internal container port your app listens on (e.g.
3000) - Use HTTPS — when enabled, QuickStack automatically provisions a Let's Encrypt certificate
- Redirect HTTP to HTTPS — when enabled, all HTTP traffic is redirected to HTTPS (requires Use HTTPS)
- Hostname — the domain or subdomain (e.g.
- Click Save.
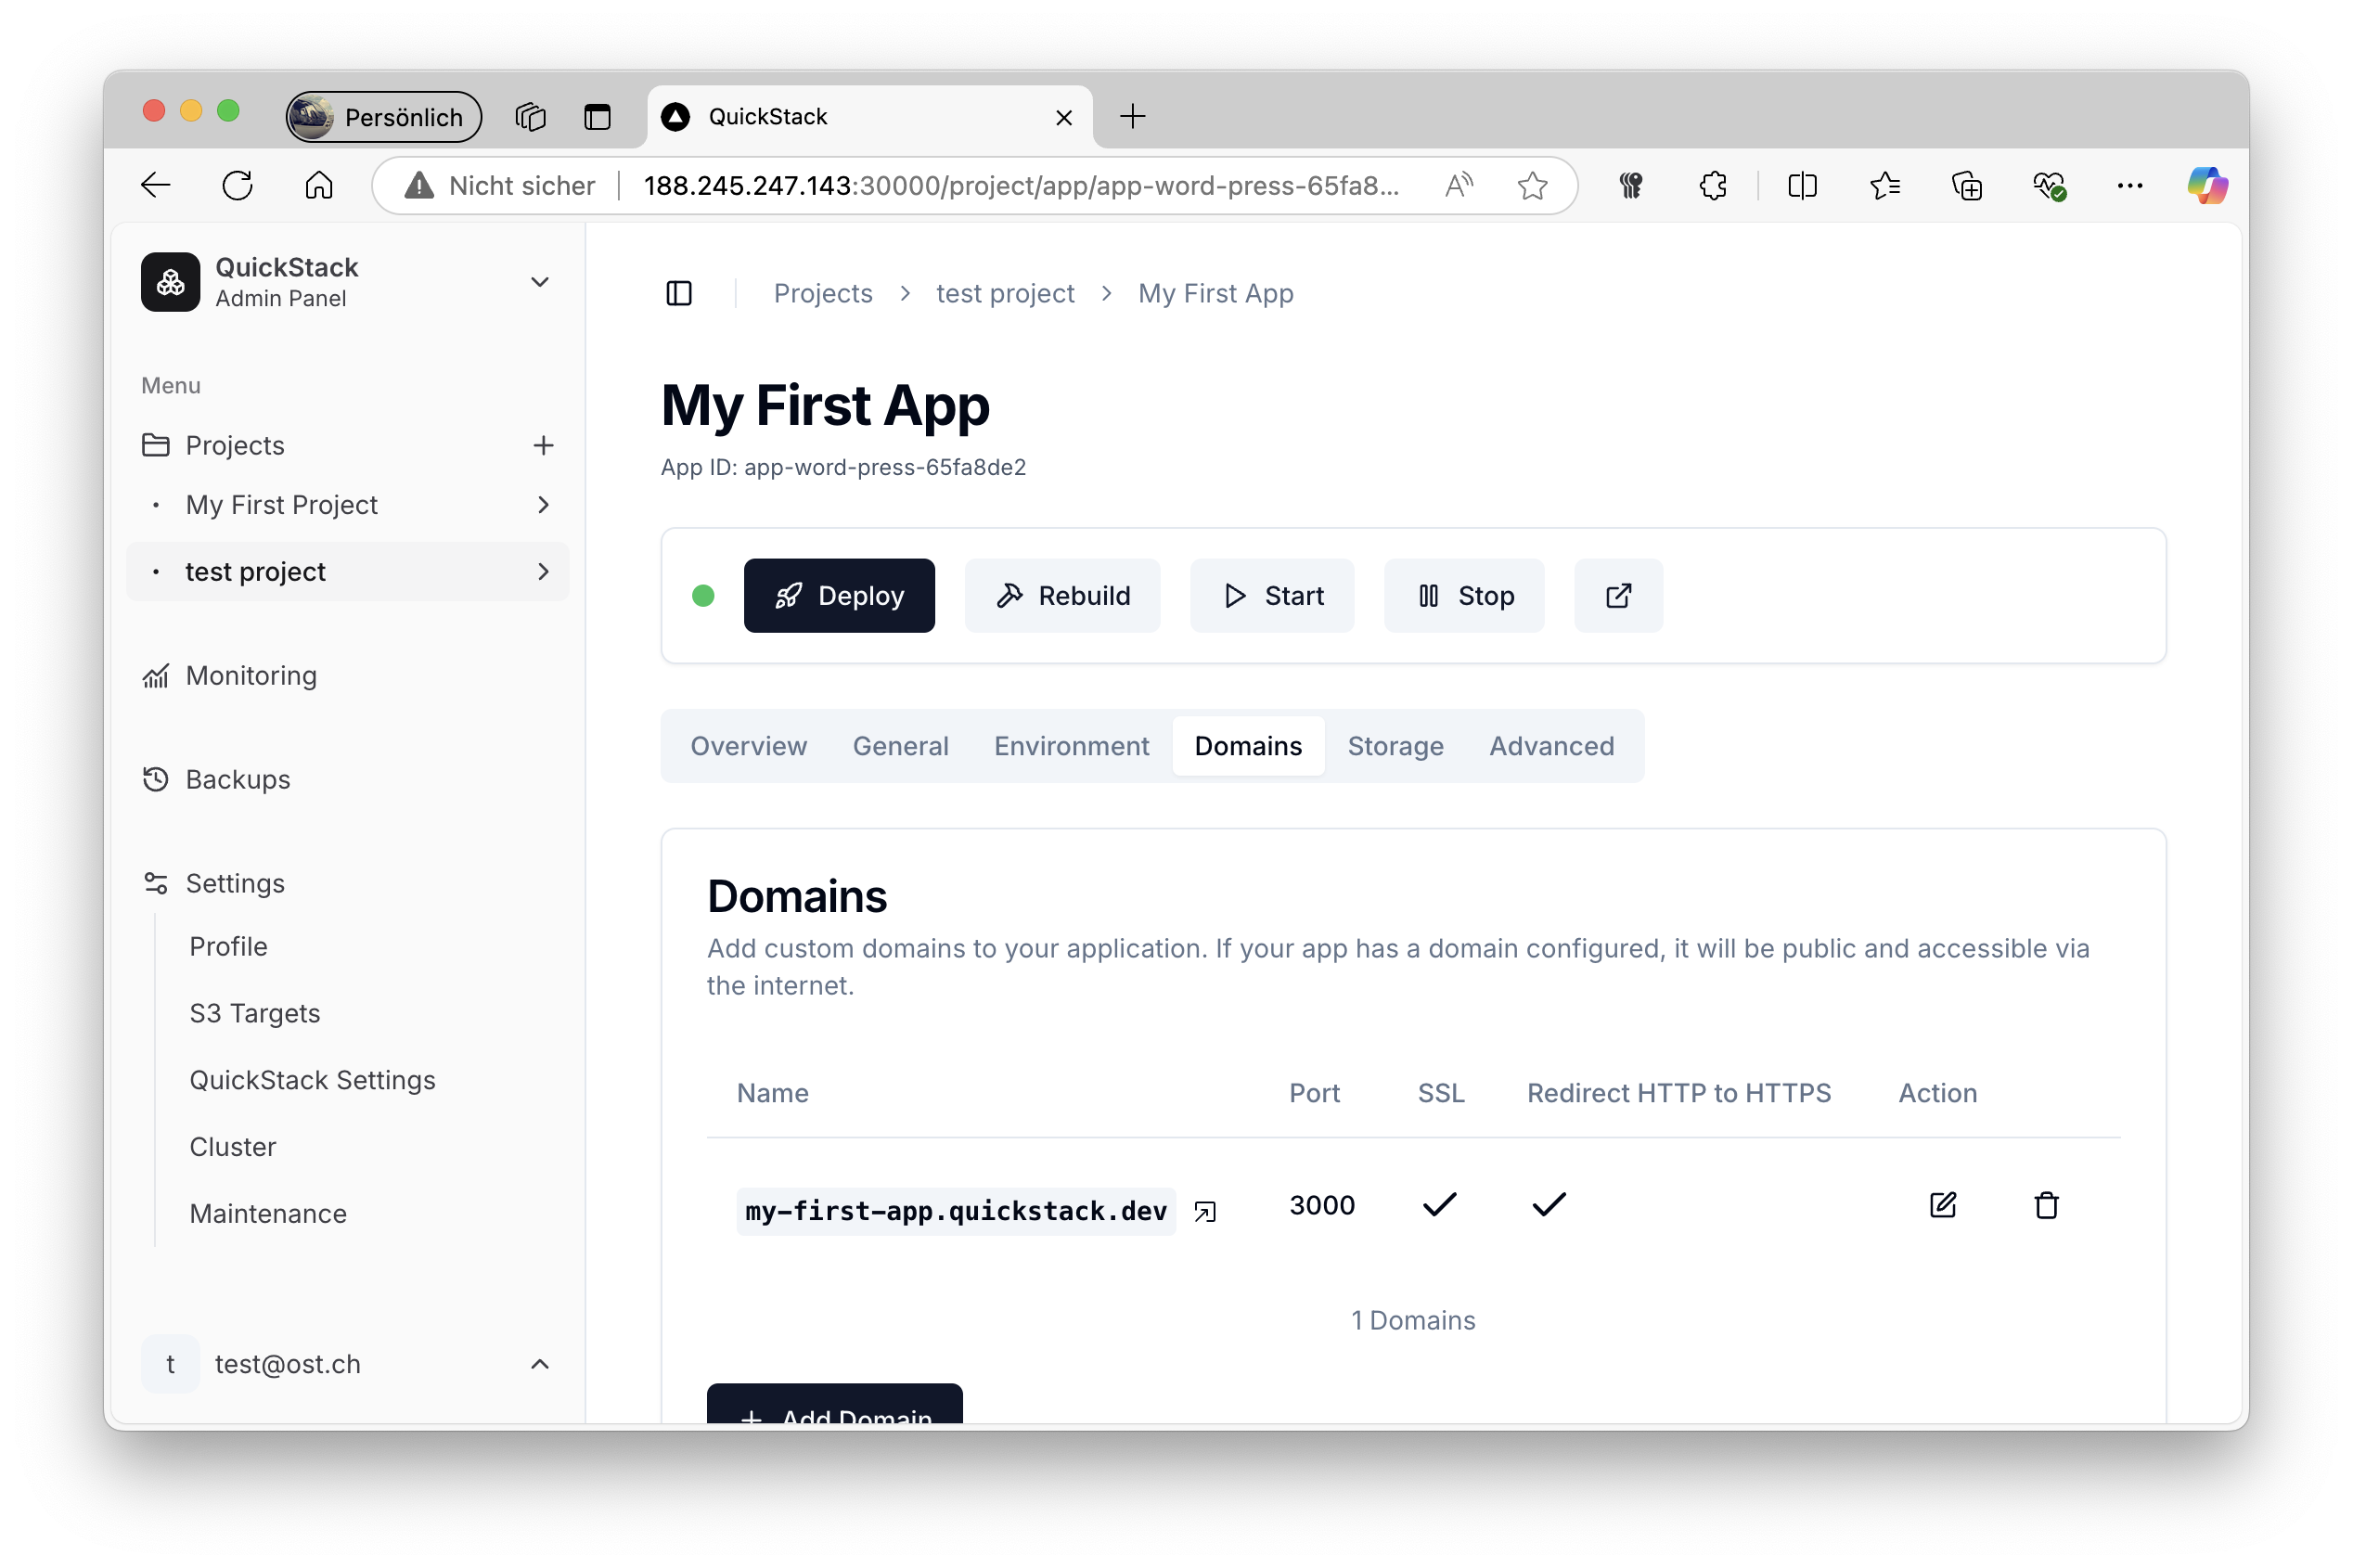
The Domains & Networking tab also holds Node Ports for non-HTTP traffic, and networking & network policies for controlling which workloads may reach the app.
Deploy to apply changes
Domain changes are not applied until you click Deploy. The app must be redeployed for the new domain to become active.
Troubleshooting
| Problem | Action |
|---|---|
| Domain does not resolve | Wait for DNS propagation; verify A record points to the correct server IP |
| Domain resolves but app not reachable | Check that App Port matches the port your container actually listens on |
| HTTPS certificate fails | Ensure Let's Encrypt email is configured in Settings → QuickStack Server → Networking / Traefik |
| Still not working | Open an issue on GitHub |
Related
- QuickStack.me domain — free built-in subdomain with automatic HTTPS
- Networking & network policies